Qt Grpc
最近又回归了金融行业,做 PC 客户端软件
服务端用 go 写的,用了 grpc,自然客户端也要共用 proto 文件
正巧,Qt 6.8 正式纳入了 qt grpc 模块,让我们搭建环境,Thinking in Qt!
Q_ENUM_NS
Qt GRPC 模块一般和 Qt Protobuf 模块一起使用
它不是开箱可用的,必须先安装 protoc,可选安装 openssl
众所周知,Qt6 使用 CMake 构建工程,默认不支持 qmake 导入该模块
Qt 提供了 Protobuf 插件,通过引入 ProtobufTools 模块
1find_package(Qt6 COMPONENTS ProtobufTools REQUIRED)Qt 提供了 GRPC 插件,通过引入 GrpcTools 模块
xxxxxxxxxx11find_package(Qt6 COMPONENTS GrpcTools REQUIRED)因为默认的 protoc 生成的都是 C++ 的类型,比如 std::string、std::vector
通过 Qt 的插件:qtprotobufgen 和 qtgrpcgen,生成的 .h 和 .cpp 就是 QString、QList 类型
生成的枚举类型自带 Q_ENUM_NS,可以直接 qDebug,也可以通过 QMetaEnum 转成 QString
x1
4namespace MyNamespace {5Q_NAMESPACE6enum class MyEnum : int32_t {7 ValueA = 0,8 ValueB = 1,9 ValueC = 2,10};11Q_ENUM_NS(MyEnum)12}13
14MyNamespace::MyEnum myValue = MyNamespace::MyEnum::ValueA;15QMetaEnum metaEnum = QMetaEnum::fromType<MyNamespace::MyEnum>();16QString str = metaEnum.valueToKey(int(myValue));17
18qDebug() << myValue; // 输出 MyNamespace::MyEnum::ValueA19qDebug() << str; // 输出 "ValueA"
vcpkg
Qt 推荐使用 vcpkg 安装 gRPC、Protobuf 和 OpenSSL 模块
这里说下 Qt Creator 配置 vcpkg
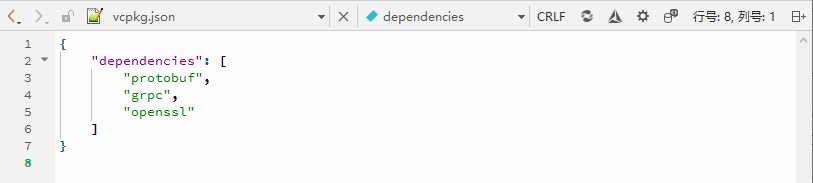
打开终端,依次输入命令,安装 protobuf、grpc 和 openssl
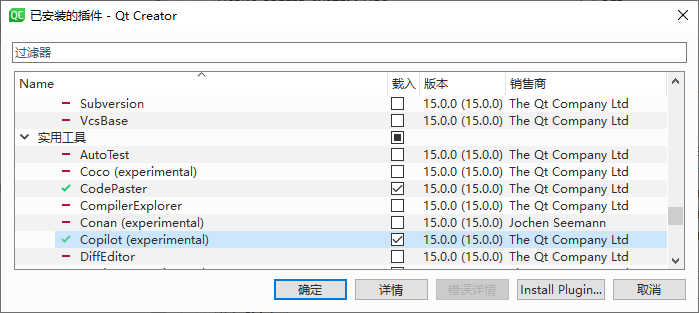
xxxxxxxxxx61cd C:\2git clone https://github.com/microsoft/vcpkg.git3bootstrap-vcpkg.bat4vcpkg.exe install protobuf5vcpkg.exe install grpc6vcpkg.exe install openssl打开 Qt Creator,点击【帮助】——【关于插件...】
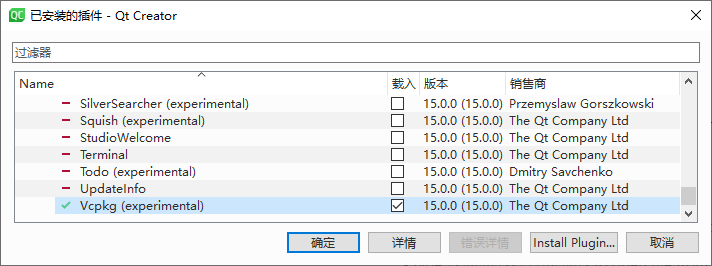
点击 【编辑】——【Preferences... 设置】——【CMake】——【Vcpkg】,填入 vcpkg.exe 所在的目录

新建项目后(Build system 选 cmake),点击【文件】——【New File...】
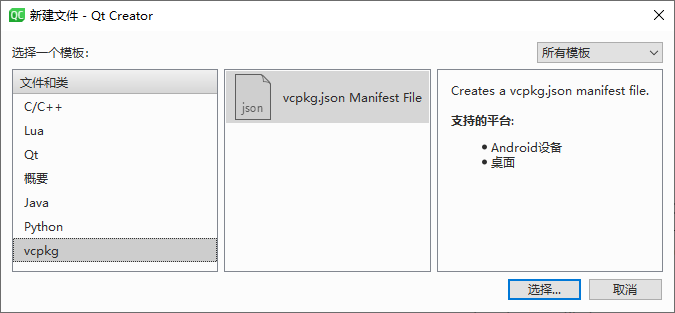
编辑 vcpkg.json
CMakeLists.txt
官网的太简单,这里给一份复杂点的参考,方便大家复制粘贴
xxxxxxxxxx351├─image2│ └─image.qrc3│ └─my_client.ico4│5├─pem6│ └─pem.qrc7│ └─ca-cert.pem8│ └─ca-key.pem9│ └─client-cert.pem10│ └─client-key.pem11│ └─client-req.pem12│13├─proto14│ ├─common15│ │ ├─const.proto16│ │ └─param.proto17│ │18│ ├─md19│ │ └─md.proto20│ │21│ ├─trader22│ │ └─trader.proto23│ │24│ └─tt25│ └─tt_server.proto26│27├─main.cpp28│29├─mainwindow.cpp30│31├─mainwindow.h32│33├─vcpkg.json34│35└─CMakeLists.txtxxxxxxxxxx1041cmake_minimum_required(VERSION 3.16)2
3project(my_client VERSION 0.1 LANGUAGES CXX)4
5set(CMAKE_AUTOUIC ON)6set(CMAKE_AUTOMOC ON)7set(CMAKE_AUTORCC ON)8
9set(CMAKE_CXX_STANDARD 17)10set(CMAKE_CXX_STANDARD_REQUIRED ON)11
12find_package(OpenSSL REQUIRED)13
14find_package(Qt6 REQUIRED COMPONENTS15 Core16 Grpc17 GrpcTools18 Gui19 Protobuf20 ProtobufQtCoreTypes21 ProtobufQtGuiTypes22 ProtobufTools23 ProtobufWellKnownTypes24 Widgets25)26
27set(SOURCES28 main.cpp29 mainwindow.h30 mainwindow.cpp31 mainwindow.ui32 33)34
35qt_add_executable(my_client WIN3236 ${SOURCES}37 image/image.qrc38 pem/pem.qrc39)40
41target_compile_options(my_client PRIVATE /utf-8)42
43qt_add_protobuf(my_client44 PROTO_FILES proto/common/const.proto45 PROTO_INCLUDES ${CMAKE_CURRENT_SOURCE_DIR}46 OUTPUT_DIRECTORY ${CMAKE_CURRENT_BINARY_DIR}/proto/common47)48
49qt_add_protobuf(my_client50 PROTO_FILES proto/common/param.proto51 PROTO_INCLUDES ${CMAKE_CURRENT_SOURCE_DIR}52 OUTPUT_DIRECTORY ${CMAKE_CURRENT_BINARY_DIR}/proto/common53)54
55qt_add_protobuf(my_client56 PROTO_FILES proto/md/md.proto57 PROTO_INCLUDES ${CMAKE_CURRENT_SOURCE_DIR}58 OUTPUT_DIRECTORY ${CMAKE_CURRENT_BINARY_DIR}/proto/md59)60
61qt_add_protobuf(my_client62 PROTO_FILES proto/trader/trader.proto63 PROTO_INCLUDES ${CMAKE_CURRENT_SOURCE_DIR}64 OUTPUT_DIRECTORY ${CMAKE_CURRENT_BINARY_DIR}/proto/trader65)66
67qt_add_protobuf(my_client68 PROTO_FILES proto/tt/tt_server.proto69 PROTO_INCLUDES ${CMAKE_CURRENT_SOURCE_DIR}70 OUTPUT_DIRECTORY ${CMAKE_CURRENT_BINARY_DIR}/proto/tt71)72
73qt_add_grpc(my_client74 CLIENT75 PROTO_FILES76 ${CMAKE_CURRENT_SOURCE_DIR}/proto/md/md.proto77 ${CMAKE_CURRENT_SOURCE_DIR}/proto/tt/tt_server.proto78 PROTO_INCLUDES79 ${CMAKE_CURRENT_SOURCE_DIR}80 ${CMAKE_CURRENT_SOURCE_DIR}/proto/md81 ${CMAKE_CURRENT_SOURCE_DIR}/proto/tt82)83
84target_include_directories(my_client85 PRIVATE86 ${CMAKE_CURRENT_SOURCE_DIR}87 ${CMAKE_BINARY_DIR88 proto/common89 proto/trader90 proto/md91 proto/tt92)93
94target_link_libraries(my_client PRIVATE95 OpenSSL::SSL96 OpenSSL::Crypto97 Qt6::Core98 Qt6::Grpc99 Qt6::Gui100 Qt6::Protobuf101 Qt6::ProtobufWellKnownTypes102 Qt6::Widgets103)104
这样,会在 build/Desktop_Qt_6_8_3_MSVC2022_64bit-RelWithDebInfo/proto 文件夹生成各种 _qtprotoreg.cpp、*.qpb.cpp 和 *.qpb.h
TLS
xxxxxxxxxx231QFile certFile(":/pem/client-cert.pem");2certFile.open(QIODevice::ReadOnly);3QSslCertificate serverCert(&certFile);4certFile.close();5QFile keyFile(":/pem/client-key.pem");6keyFile.open(QIODevice::ReadOnly);7QSslKey serverKey(&keyFile, QSsl::Rsa, QSsl::Pem);8keyFile.close();9QFile caCertFile(":/pem/ca-cert.pem");10caCertFile.open(QIODevice::ReadOnly);11QSslCertificate caCert(&caCertFile);12caCertFile.close();13QSslConfiguration sslConfig;14sslConfig.setLocalCertificate(serverCert);15sslConfig.setPrivateKey(serverKey);16sslConfig.addCaCertificate(caCert);17sslConfig.setPeerVerifyMode(QSslSocket::VerifyPeer);18sslConfig.setProtocol(QSsl::TlsV1_2);19sslConfig.setAllowedNextProtocols({{"h2"}});20QGrpcChannelOptions channelOptions;21channelOptions.setSslConfiguration(sslConfig);22auto tt_server_channel = std::make_shared<QGrpcHttp2Channel>(QUrl("https://127.0.0.1:7777"), channelOptions);23tt_server_client->attachChannel(tt_server_channel);这里要特别提一下这句
xxxxxxxxxx11sslConfig.setAllowedNextProtocols({{"h2"}});一开始一直连不上服务器
非常感谢下面这个链接,帮了我大忙
另外
xxxxxxxxxx11sslConfig.setPeerVerifyMode(QSslSocket::VerifyPeer);也可以改成
xxxxxxxxxx11sslConfig.setPeerVerifyMode(QSslSocket::VerifyNone);这样就不用验证 key 了
xxxxxxxxxx51sslConfig.setProtocol(QSsl::TlsV1_3); 2
3//也可以根据情况改成4
5sslConfig.setProtocol(QSsl::TlsV1_2);
GRPC
qt grpc 主要有 unary calls 和 bidirectional streams (以及 server streams 和 client streams)
通过 QGrpcCallReply 和 QGrpcBidiStream 来使用,这里简单分享下用法
xxxxxxxxxx161qint64 requestTime = QDateTime::currentMSecsSinceEpoch();2ping::pong::Ping request;3request.setTime(requestTime);4
5auto reply = cl.PingPong(request,{});6QObject::connect(reply.get(), &QGrpcCallReply::finished, reply.get(),7                 [requestTime, replyPtr = reply.get()]() {8                     if (const auto response = replyPtr->read<ping::pong::Pong>())9                        qDebug() << "Ping-Pong time difference" << response->time() - requestTime;10                    qDebug() << "Failed deserialization";11                 });12
13QObject::connect(reply.get(), &QGrpcCallReply::errorOccurred, stream.get()14 [](const QGrpcStatus &status) {15 qDebug() << "Error occurred: " << status.code() << status.message();16 });xxxxxxxxxx171QObject::connect(stream.get(), &QGrpcBidiStream::messageReceived, stream.get(),2 [streamPtr = stream.get(), &timer, &maxPingPongTime, &requestTime]{3 if (const auto response = streamPtr->read<ping::pong::Pong>())4 maxPingPongTime = std::max(maxPingPongTime, response->time() - requestTime);5 });6
7QObject::connect(stream.get(), &QGrpcBidiStream::finished, stream.get(),8 [streamPtr = stream.get(), &timer, &maxPingPongTime]{9 qDebug() << "Maximum Ping-Pong time: " << maxPingPongTime;10 timer.stop();11 });12
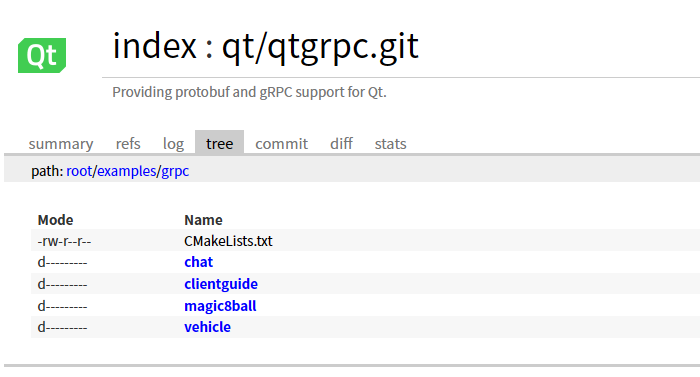
13QObject::connect(stream.get(), &QGrpcBidiStream::errorOccurred, stream.get(),14 [&timer](const QGrpcStatus &status){15 qDebug() << "Error occurred: " << status.code() << status.message();16 timer.stop();17 });可以登录 Qt 官方的 git,查看最新的 demo https://code.qt.io/cgit/qt/qtgrpc.git/tree/examples/grpc
Copilot
之前我一直用网页打开 chatgpt.com,写 prompt 复制粘贴代码
Qt Creator 15.0.0 已经集成了 Copilot 插件,改变了我的编程习惯
首先是安装 node.js
然后安装 Neovim
最后 clone 以下仓库,参考下图配置 node.exe 及 language-server.js
xxxxxxxxxx11git clone https://github.com/github/copilot.vim.git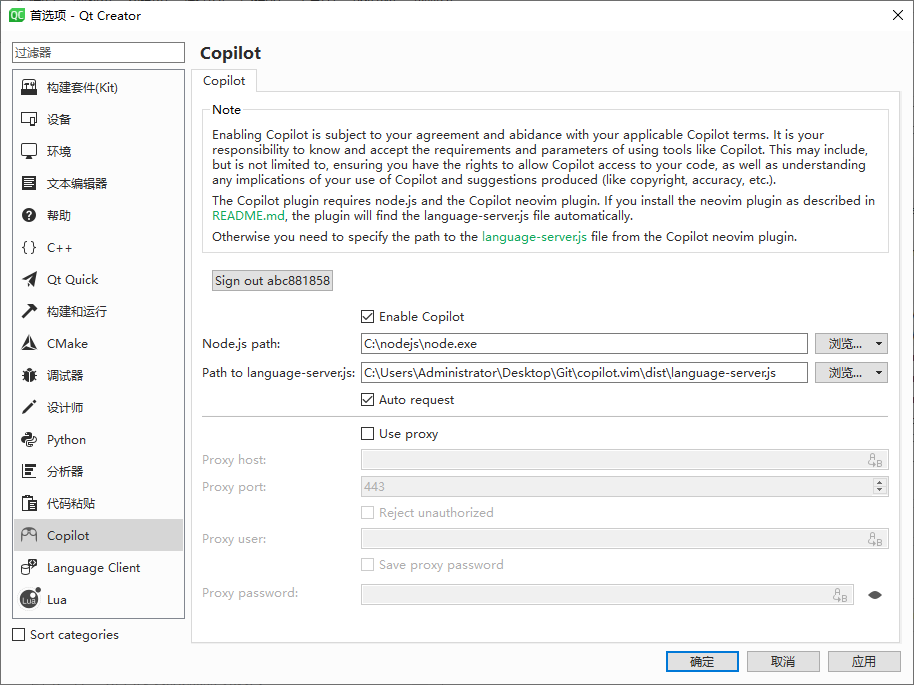
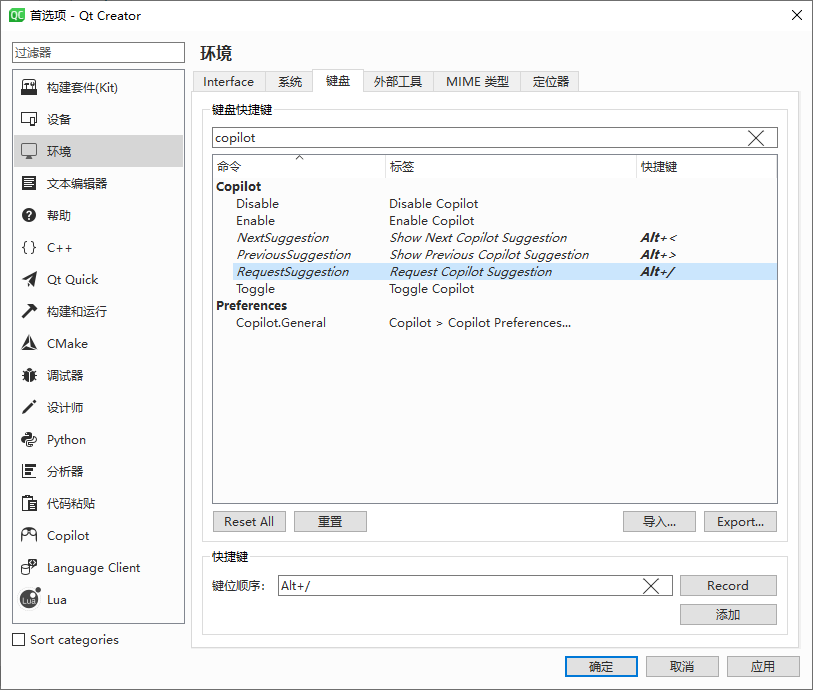
现在我编写代码都常开代理,善用 tab 了
分享下我的快捷键设置
End
最后的最后,再次感谢 vcpkg 和 copilot!